Hexo 第一次魔改全记录
Hexo Pug 主题修改 非典型教程
为了庆祝2020年的到来和大二上学期的结束,(其实是越来越觉得博客太丑了),我决定对半岁大的博客痛下杀手全面改造。
这一次改造的目标是: - 提高可读性 - 美化界面 - 推广博客,以假装是dalao
1. 选择合适的主题

这是我之前用的主题freemind,并且在原来的主题上进行魔改,使得博客看起来更丑的同时降低了可读性
顺着终端风的思路,我找到了一个和终端有那么一丝丝关系的主题terminal

选择这个主题的理由很简单,可读性极佳,审美在线,把杂七杂八的东西扔进终端里,让页面的其他部分变得非常简洁
2. 魔改主题
部署这个主题没几秒,就发现了这个主题虽然好,但是我不太满意的地方也有不少
配置文件解析部分
原来配置文件的格式是这样的
1 | Sheep: |
这段配置会在终端上生成这样的代码
1 | > Sheep.education |
乍一看没啥毛病,但是这样输出内容的形式其实是比较固定的,输入一行前缀固定,输出只有一行,输出复杂内容就不太行了,而且编写配置文件也比较麻烦
于是我干脆就重写配置文件解析部分,现在配置文件看起来像这样
1 | about: |
其中,配置的格式如下 - pwd 终端显示的工作目录 - cmd 终端执行的命令 - outputs 命令执行后输出的结果 参数类型是yaml的array - text 终端输出的文字 - type 输出的格式 - (无) 普通文本格式 - url 超链接,打开新选项卡 - url_intra 超链接,不打开新选项卡 - ending 结尾的文字 - (无) 换行 - (str) 输出str里的内容
最终效果如下 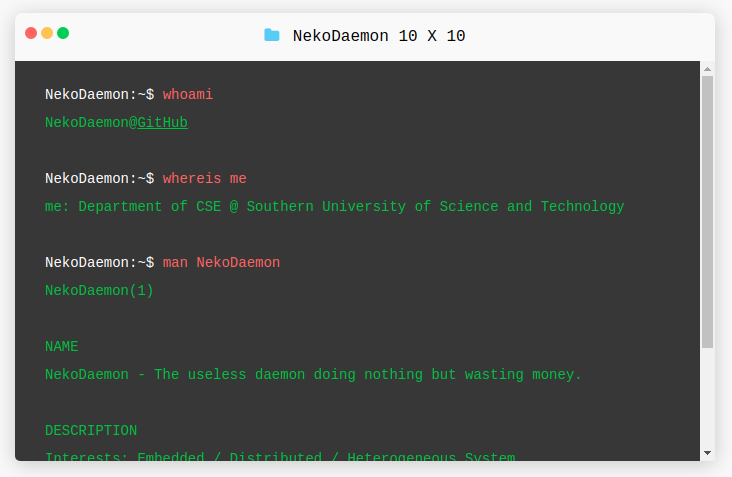
其中解析的代码写在terminal-util.pug文件里
1 | mixin _terminal_render_outputs(outputs) |
这里面有三个相关函数 - _terminal_render_outputs 解析并渲染命令输出结果部分 - terminal_exec 渲染模拟执行命令的效果 - 函数自身渲染输入部分 - 调用了_terminal_render_outputs渲染输出部分 - 参数格式和yaml中的格式相同 - terminal_print_cmd_in_yaml 解析yaml设置中的数据 - 调用了terminal_exec渲染单条命令 - 典型用法: (来源: terminal.pug) 1
2if is_current("/about")
+terminal_print_cmd_in_yaml(theme.terminal.about)
恢复Categories页
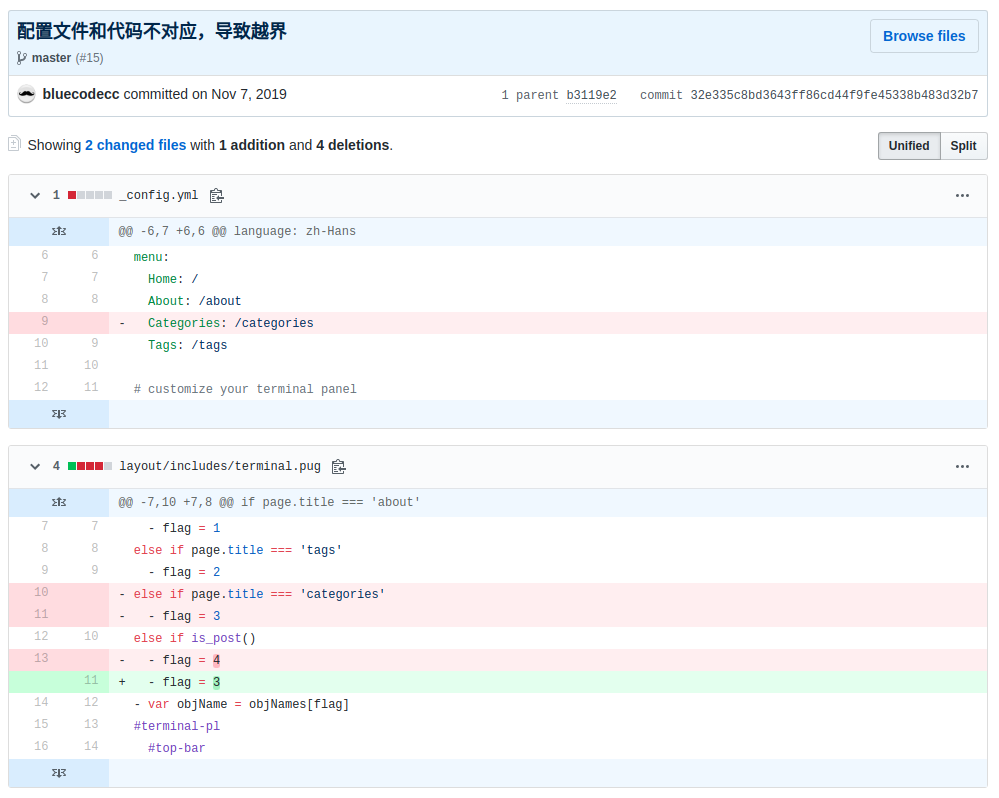
Terminal主题最新的commit是修了一个越界的bug,解决方法是干掉categories页
这个解决方法和其代码风格一样粗犷放肆,贴一段给你们感受一下
1 | - var fileName = page.title || 'home' |
于是我干脆就把这段重写了,毕竟乔老人家说过不仅要追求外在美,内在……至少不能丑
1 | include ./terminal/terminal-util.pug |
值得注意的是这里用了一些Hexo的内置函数 > - is_home 检查当前页面是否为首页 - is_post 检查当前页面是否为文章 - is_current 检查path是否符合目前页面的网址
其实Hexo也提供了is_category和is_tag函数,但是我测试后发现这两个函数并不能使用
代码改完以后自然而然的,Categories页就回归了,毕竟原来的代码没删掉
归档
虽然Hexo原生支持归档页,但是Terminal主题并没有相关代码,我觉得单独给归档页写代码,写样式,占用导航栏一格空间又不是很值得
当我看到Tags页和Categories页的Terminal空空如也的时候就决定,把归档扔在这两页的Terminal里
还是在terminal-util.pug文件里写下生成归档信息的代码
1 | mixin terminal_print_archives() |
简单来说就是 - 先根据文章创建年份将文章扔进不同数组里 - 对数组进行排序 - 先给月日进行排序,再对年份进行排序 - 值得注意的是,这里用了date函数生成指定格式的时间信息,用sort函数进行排序,sort函数需要提供一个比较函数 - 输出结果
最终的效果如下 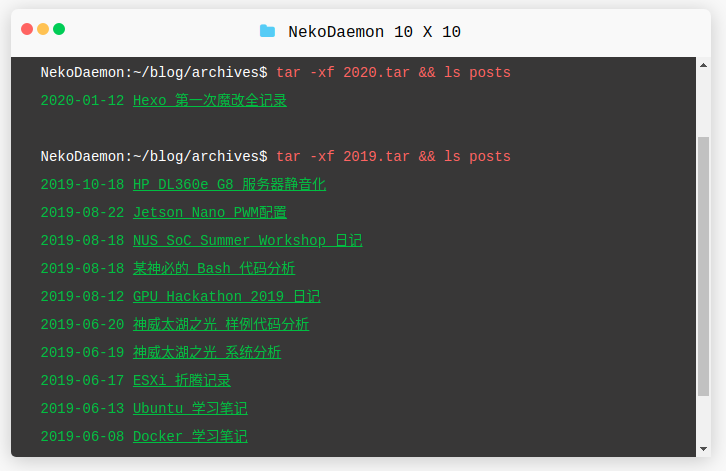
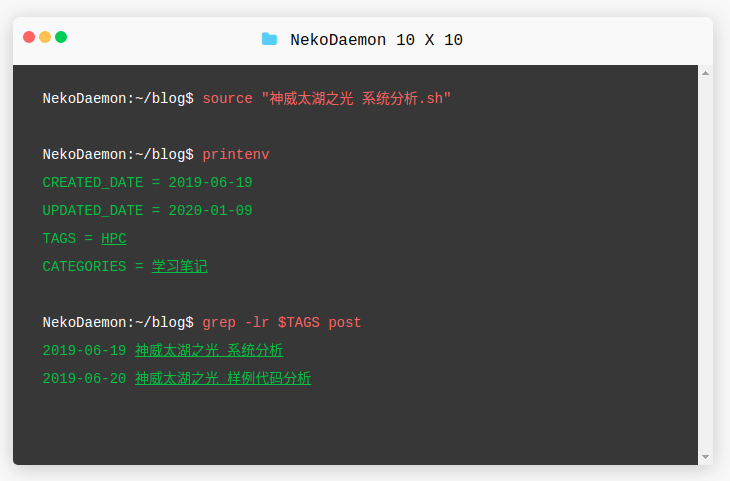
显示相同tag的文章
这部分的代码写在terminal-post/pug文件里,代码比较简单,和归档的代码比较相似 1
2
3
4
5
6
7
8
9
10
11
12
13
14
15+terminal_exec("blog", "grep -lr $TAGS post", false)
- var articles = []
if page.tags.data
each article in site.posts.data
if article.tags.data
- var isRelated = false
each tag in article.tags.data
each val in page.tags.data
if val.name == tag.name
- isRelated = true
if isRelated
- articles.push(article)
+terminal_print_titles(articles)
最终的效果如下,我还顺便改掉了原先的信息显示方式,压缩了一下空间
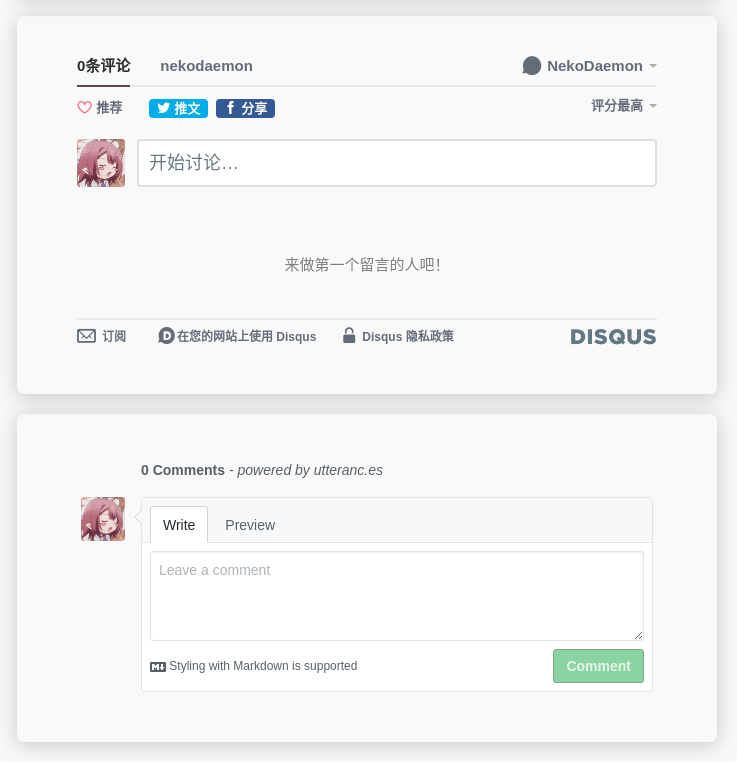
评论
一开始我是移植了disqus评论系统,从maupassant-hexo这个主题里找到了相关的代码,然后截取了我看得懂的一段代码
修改后的代码在disqus.pug文件里
配置_config.yml,写上shortname,即可使用disqus,例如 1
disqus: NekoDaemon
考虑到国内很多人无法加载disqus,那就很有必要把无法加载的提示做得好看一点
原来的代码如下 1
2
3
4if theme.disqus
#disqus_thread
.btn_click_load
button.disqus_click_btn 阅读评论(请确保 Disqus 可以正常加载)
被改成了这样 1
2
3
4
5if theme.disqus
#disqus_thread
.btn_click_load
div.disqus_click_btn
a.article-comment 阅读评论(请确保 Disqus 可以正常加载)
并在post.styl文件中添加复制article-comment按钮样式 1
2
3
4
5.article-more
@extend $btn
float: right
.article-comment
@extend $btn
又考虑到,什么都没考虑,就是看到了巨佬的这篇文章,就决定换utterances评论系统了
简单来说这个系统是借助了GitHub的帐号系统,并把评论存在我的repo的issues里,具体的配置过程非常简单,参考官网即可,另外还需要在主题里嵌入一个js,嵌入的代码如下,我把这段代码保存在utterances.pug里 1
2
3
4
5
6
7
8if theme.utterances
script(type='text/javascript'
src= "https://utteranc.es/client.js"
repo= theme.utterances
issue-term= "pathname"
theme= "github-light"
crossorigin= "anonymous"
async= true)
并找到文章的模板post.pug,然后include这个pug文件,顺便给评论套一个和文章正文一模一样的样式 1
2
3
4
5
6
7
8
9
10
11
12
13
14extends includes/layout.pug
block content
article#post
a.article-title= page.title || 'No Title'
time.article-date #[i(class="fa fa-calendar" aria-hidden="true")] !{date(page.date, config.date_format)}
!= page.content
if theme.disqus
article#post
include includes/disqus.pug
if theme.utterances
article#post
include includes/utterances.pug
include includes/pagination.pug
最终的效果如下(现在已关闭disqus评论功能)
断网的效果

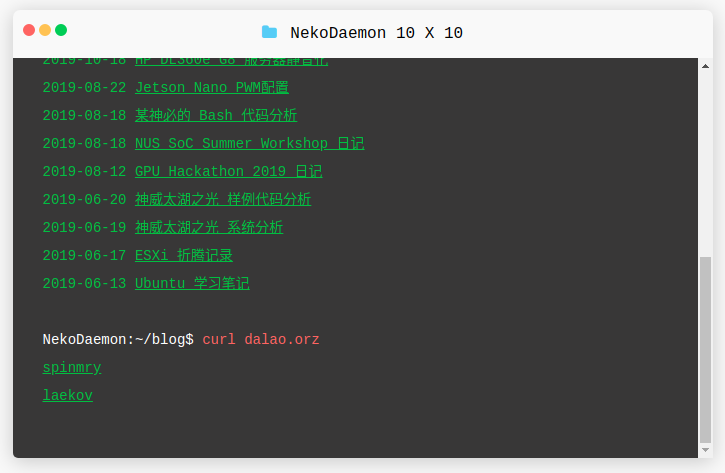
友情链接
造博客的乐趣之一不就是加友链吗,现在的人们加什么微信,加个友链不是充满逼格吗(雾)
友链被我放在了Terminal里,代码比较简单,在terminal-links.pug里,在合适的地方include即可使用 1
2
3
4
5
6
7include terminal-util.pug
- var outputs = []
each url, name in theme.terminal.Links
- outputs.push({type:"url", url:url, text:name})
+terminal_exec("blog", "curl dalao.orz", outputs)
br
其中配置文件的格式如下 1
2
3
4terminal:
Links:
spinmry: https://blog.spinmry.moe
laekov: https://laekov.com.cn
特别感谢以上两位dalao,他们分别是线上碰到的第一个主动加我友链的,和线下碰到的第一个主动加友链的人,最终效果如下
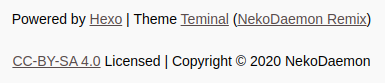
版权声明
其实折腾版权声明对我来说最大的作用就是限制抄袭课程作业的人的行为。在查重的时候被老师误杀,与老师argue的时候,我可以声称我允许对方使用我的代码,但必须署名,抄袭的同学没有保留署名所以是他的错
但是原先的主题并没有这方面考虑,所以在footer.pug文件把原先的内容 1
2
3p.design-info
| power by #[a(href="https://hexo.io" target="_blank") Hexo] | theme #[a(href="https://github.com/lazysheep666/terminal_theme" target="_blank") Teminal]
p.copyright= `Copyright © ${config.author} Blog ${new Date().getFullYear()}` 1
2
3
4
5
6p.design-info
| Powered by #[a(href="https://hexo.io" target="_blank") Hexo] | Theme #[a(href="https://github.com/lazysheep666/terminal_theme" target="_blank") Teminal] (#[a(href="https://github.com/Tonny-Gu/terminal_theme" target="_blank") NekoDaemon Remix])
p.design-info
a(href=theme.license.url target="_blank")= theme.license.name
|
| Licensed | Copyright © #{new Date().getFullYear()} #{config.author}
并且在_config.yml里加上 1
2
3license:
name: CC-BY-SA 4.0
url: https://creativecommons.org/licenses/by-sa/4.0/
顺便把原作者不太地道的英语表达换掉了,值得一提的是我把copyright样式换成了design-info样式是因为在移动端上后者渲染的字体大小更加合适,并且对电脑端毫无影响,最后看起来是这个样子的
本地化加速
先前用的font-awesome脚本加载起来奇慢无比,导致在一开始,图标都加载不出来,在W3CSchool的推荐下换成了境内CDN加速过的源,只需要对_config.yml稍作修改 1
2
3css:
# font-awsome: https://netdna.bootstrapcdn.com/font-awesome/4.7.0/css/font-awesome.min.css
font-awsome: https://cdn.staticfile.org/font-awesome/4.7.0/css/font-awesome.min.css
3. Hexo侧优化
摘要生成
之前在主页上,每篇文章都会显示全文,要划拉半天才见到下一个标题和下一页的按钮,所以只需要安装一个插件即可自动生成文章的摘要(其实就是类似| head -n 10一下)
安装一个组件即可解决问题,主题会优先使用摘要,而不是全文 1
npm install hexo-excerpt --save
SEO优化
针对Hexo的SEO优化的文章有很多,比如这篇
简单来说就是 - 添加robots.txt - 生成sitemap - 添加网站到Google Search Console
修复奇妙的bug
当遇到莫名其妙的错误的时候,据说重装一下node modules就有可能会有奇效,反正我重装了一次确实解决了几个莫名其妙的bug,难关Google一下npm会自动补全reinstall,啧啧
One more word
放假前三天的空余时间都拿来魔改博客了,觉得至少需要自己魔改主题,自己的博客才拿得出手,毕竟听说真正的dalao都是,最多从jQuery开始徒手撸框架的